So you just signed up for EasyWP and want to install an SSL Certificate. You also don’t want to pay for it and don’t want to jump through a bunch of BS hoops. I’m going to show you how to do just that – install SSL on EasyWP in just a few minutes for free.
There is official documentation on how to upload SSL certs to EasyWP, but it doesn’t tell you how to generate your own cert for free.
Most hosts provide free SSL and their support takes care of everything. But not EasyWP (perhaps not easy at everything). Some say this is how Namecheap actually makes their money. The cheapest SSL for Namecheap is about $8 a year. Not a whole lot of money, but still, considering the other services, I hate to pay for it.
Using LetsEncrypt
The most popular free SSL certificate out there is LetsEnctrpt. If you head over to their website, there’s no intuitive way to get started without reading and understanding a bunch of documentation. Well, with this guide, you don’t need to do any of that.
Thankfully, there is SSL For Free (https://www.sslforfree.com/), which is a free tool that generates LetsEnctrpyt Certificates easily.
Here are two step-by-step guides I wrote. The first is a quick guide for people who are tech-savvy. The one below that is a visual guide for people who would like extra help.
Installing SSL Certificate on EasyWP – Quick Guide
- Go to https://www.sslforfree.com/, enter in your domain name, and click ‘Create FREE SSL Certificate’
- Click on ‘Manual Verification’
- Click on ‘Manually Verify Domain’
- Download the two files, “Download File #1” and “Download File #2”
- Login to EasyWP
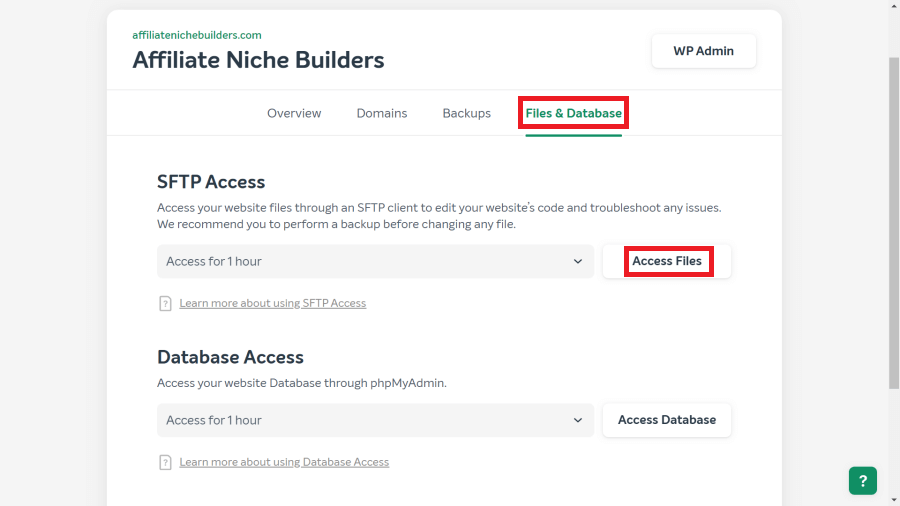
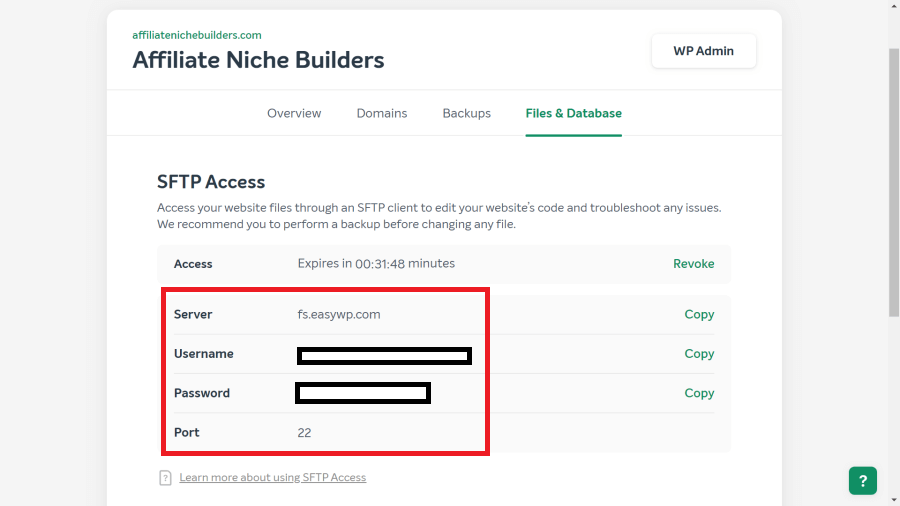
- Navigate to your site’s Files & Database section and get your SFTP details
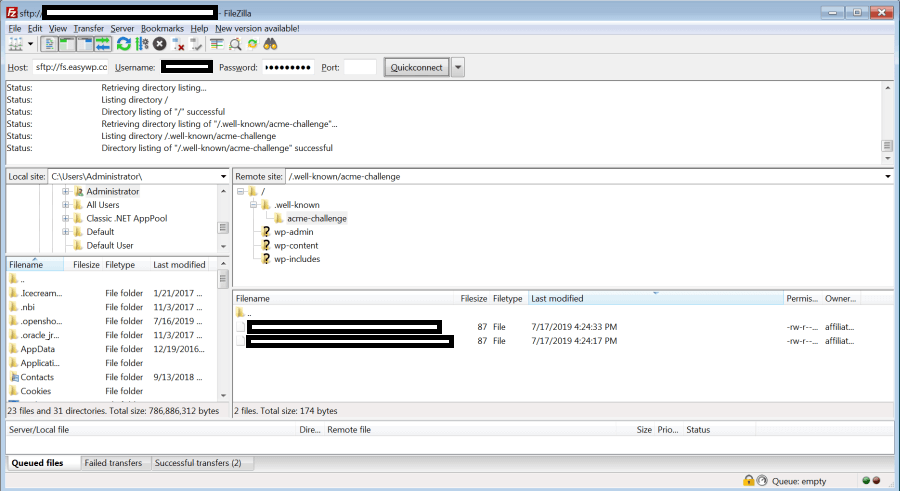
- Access your site via SFTP and create the follow structure ‘.well-known/acme-challenge’ (keep the period in front)
- Upload “Download File #1” and “Download File #2” to the acme-challenge folder
- On the SSL For Free page, click ‘Download SSL Certificate’
- Copy the text inside the ca_bundle.crt file and past it below the text inside the certificate.crt file
- On your EasyWP page, upload your certificate.crt file and private.key file and enable SSL
- Optional – Get email reminders when your certificate expires in 90 days
- Optional – Install the Really Simple SSL plugin
Installing SSL Certificate on EasyWP – Visual Guide
Head over to https://www.sslforfree.com, type in your URL, and ‘Create FREE SSL Certificate’.

Next, click on Manual Certification
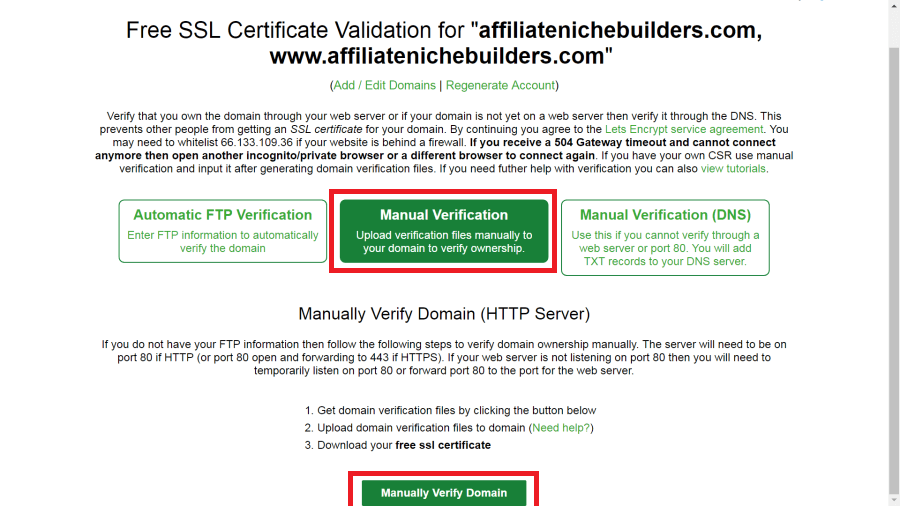
Click on Manually Verify Domain to generate the two download files. You’ll need these to upload to your site via SFTP.

Login to your EasyWP account and navigate to Files and Databases. Click ‘Access Files’ to generate your temporary SFTP credentials.
Log in to your site using an SFTP client (I use Filezilla) using your temporary credentials. Create two folders in your root directory called ‘.well-known/acme-challenge’ and upload the two files to the acme-challenge folder
Next, click ‘Download SSL Certificate’ and download your certificate

IMPORTANT – Copy the text inside the ca_bundle.crt file and past it below the text inside the certificate.crt file.
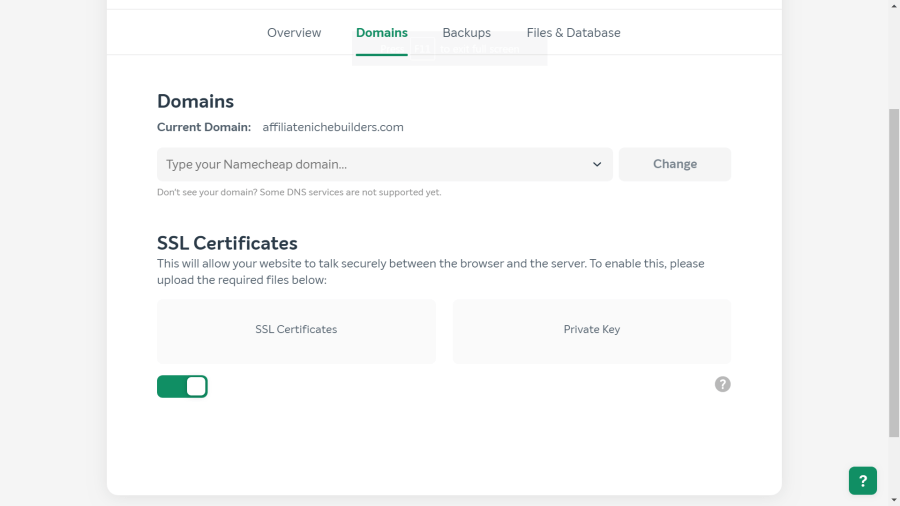
Next, upload your certificate.crt file under SSL Certificate and your private.key file under Private Key. Once complete, toggle the switch at the bottom.

Now you should be all set!
This certificate will expire in 90 days, so make sure you sign up for the email alerts at the top to get reminders before it expires.
Option but recommended – Install the Really Simple SSL plugin to make sure all your pages and resources are HTTPS.
Thanks Ben for this great tutorial. I was looking to install a free ssl cert on few of my ssl expiring sites… It will actually help me to avoid paying for premium ssl services…thanks again
Awesome Vishal, glad it helped!
guide is great but i couldn’t connect to Filezilla, therefore i couldn’t set up the ssl…
How to use cloudflare SSL with easywp?
I had no trouble following your concise & clear instructions, and I got my SSL certificate in no time. I’m not a techie, and this is all new to me. So thanks a lot!