Last weekend I took a lot of nice quality pictures for one of my affiliate sites. Having such unique and authentic images for my blog really boosts credibility. A lot of these photos were product specific images and I didn’t want other bloggers stealing them. So what did I do? I went off to add some watermarks.
If I can find a free online tool, I’ll use it. I had a bunch of images and didn’t want to add watermarks one by one. I wanted to upload all my images and add watermarks in bulk, for free.
I tried about 3 or 4 different applications, some of which I even downloaded. None of them did what I want. If I wanted to add watermarks in bulk to my images, it asked me to pay. Some programs only wanted a one time fee of $20, but I knew there must be a way to do it for free.
Finally, I found a way to do this with IrfanView. If you don’t have this program yet, go download it! You can do lots of things for cropping, resizing, and adding watermarks in bulk, and even all at the same time!
It’s a little more complex, but once you get the hang of it, it’s a pretty powerful little program. It’s one of my recommended programs on my tools page.
EDIT: After writing these, I realized I should have probably checked to see if there were plugins out there. I did find one that looks decent called Image Watermark. I haven’t tried it but looks like it will get the job done. One thing it doesn’t seem to do is add text watermarks, only image watermarks. Since I’m resizing the images in bulk already with IrfanView, it not much extra work to do it without a plugin.
How to Watermark Images in Bulk Using IrfanView
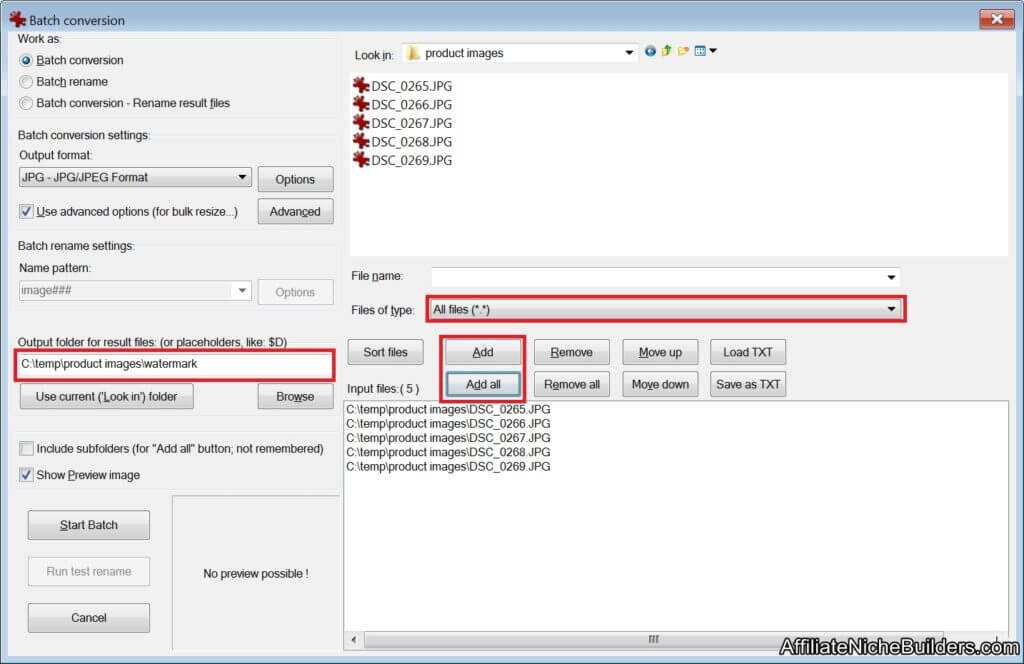
A quick note, I’m using version 4.53. If you have a different version, settings might be slightly different.
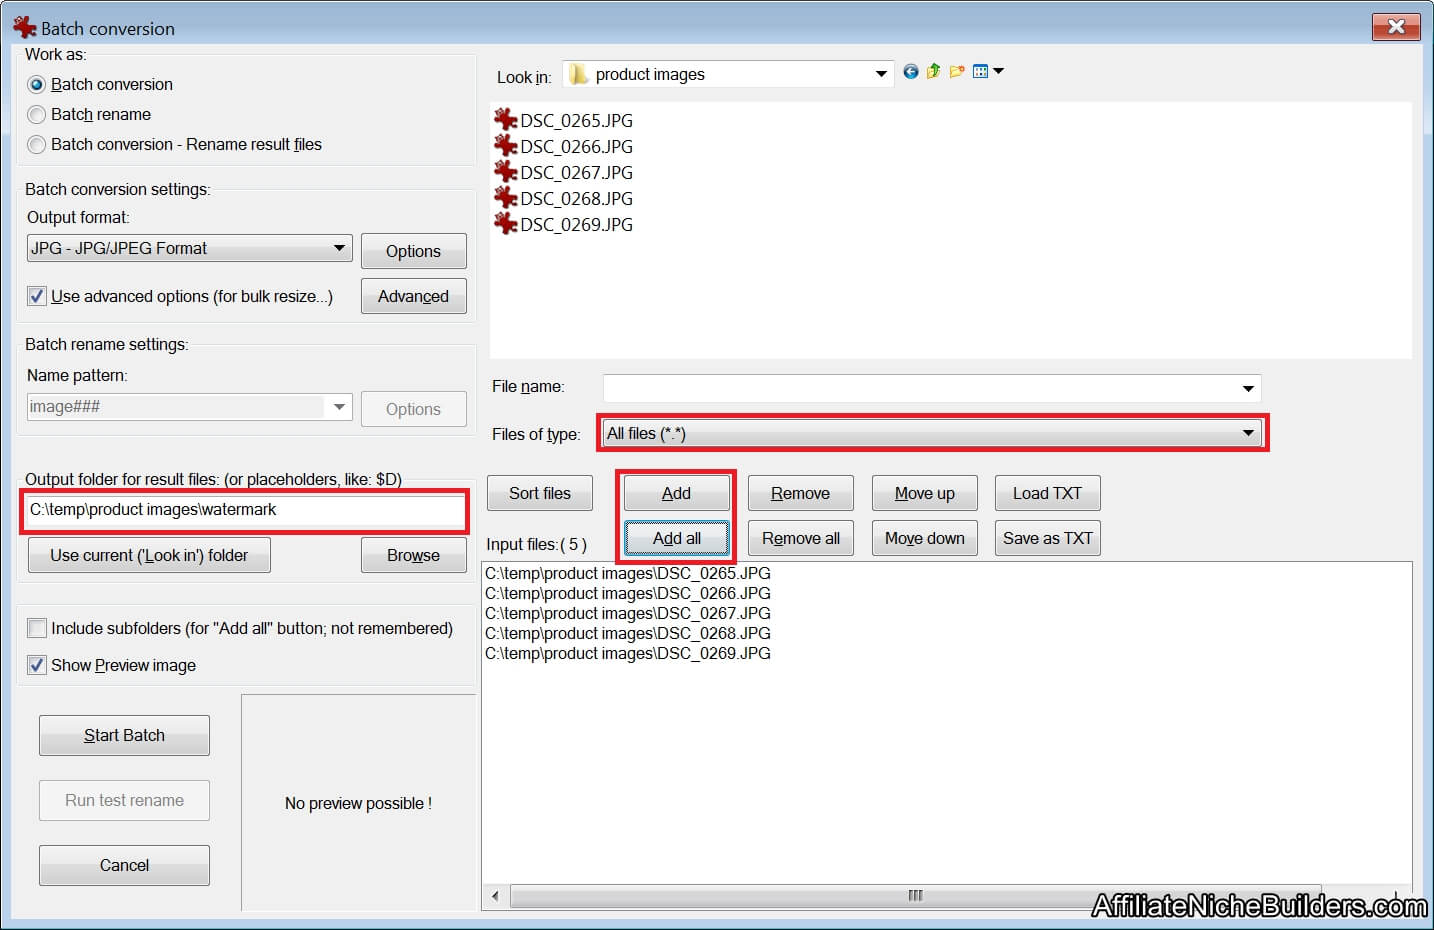
1. Make sure all the images you want to watermark are in the same folder. I’m using ‘C:\temp\product images’
2. Make a new folder for your watermarked images. I’m using ‘C:\temp\product images\watermark’
3. Open IrfanView and Go to File > Batch Conversion/Rename to bring up the batch conversion window.
4. Make sure you add your input folder, output folder (your watermark folder), and change the file type to see your images. Then, select all the files you want to watermark and click ‘Add’ or add them all by clicking ‘Add all’
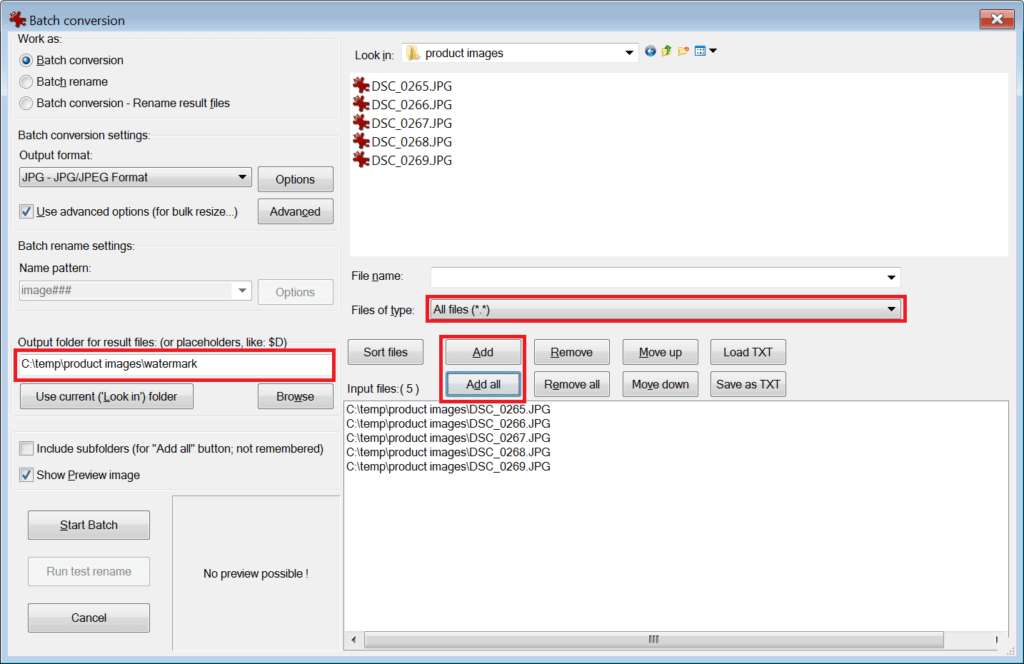
4. Click Advanced to bring up the advanced window. If you wanted to resize, crop, or edit other aspects of the image, this is the place to do it. You can even click ‘Save settings’ so you can bulk watermark even faster next time!
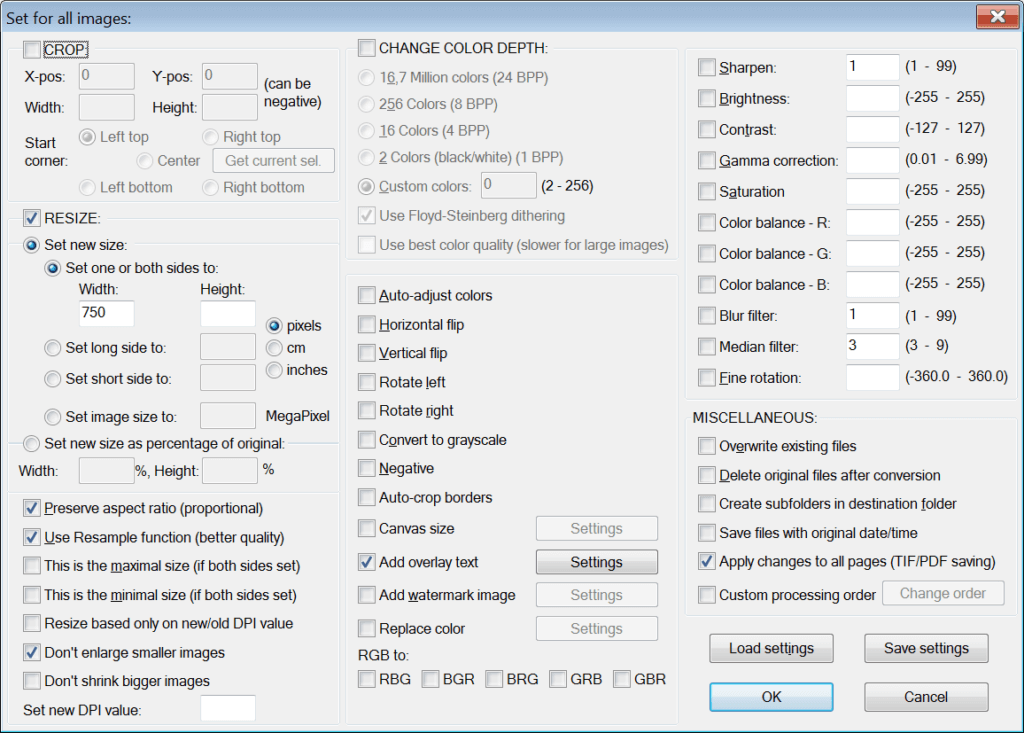
5. Click ‘Add overlay text’ and click ‘Settings’. From this screen, you get to select your font family, font size, and where the watermark will appear. Here are the settings I use to make a watermark in the bottom right corner.
6. Once you are done, click ‘OK’ and ‘OK’ again to return to the Batch window. If everything looks good, click ‘Start Batch’. Your photos will be in the output folder. This is what they will look like with the watermark.
And that’s how you add watermarks to images in bulk for free!